Difference between revisions of "Key"
Jump to navigation
Jump to search
(expand description to note that used keys disappear and that donated keys have no value) |
(import from g-s) |
||
| (11 intermediate revisions by 4 users not shown) | |||
| Line 1: | Line 1: | ||
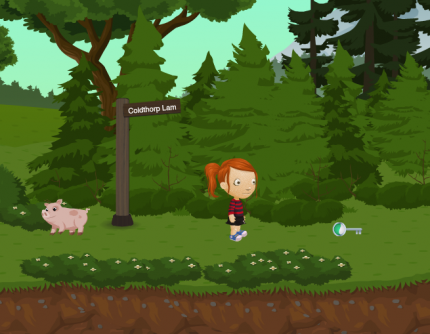
| − | A '''Key''' can be used to open a matching door often found in the same [[street]]. Once used, a key will disappear from the player's inventory. Keys have no cash value and give no reward when donated to a shrine. | + | [[File:key-rookthillslay.png|430px|thumb|right|[[Green-White Circle Key]] key on the ground in [[Rookthills Lay]].]] |
| + | |||
| + | A '''Key''' can be used to open a matching door often found in the same [[street]], though some of the keys for the keyed doors in [[Jethimadh Tower]] can be found on the surrounding streets. Once used, a key will disappear from the player's inventory. Keys have no cash value and give no reward when donated to a shrine. Some keys spawn behind other objects, making them somewhat difficult to find. | ||
[[:Category:Key|Alphabetical list of keys]] | [[:Category:Key|Alphabetical list of keys]] | ||
| + | |||
| + | ==Streets with keyed doors== | ||
| + | {| class="wikitable sortable" border="1" | ||
| + | |- | ||
| + | ! scope="col" | Door Location | ||
| + | ! scope="col" | Destination | ||
| + | ! scope="col" | Key | ||
| + | |- | ||
| + | | [[Firdaus Finds]] ([[Andra]]) || [[Plexus]] || [[Image:GreenOrangeHexagonKey511.png|50px]] [[Green-Orange Hexagon Key]] | ||
| + | |- | ||
| + | | [[Nawiwa Wend]] ([[Callopee]]) || [[Neva Neva]] || [[Image:TealWhiteTriangleKey508.png|50px]] [[Teal-White Triangle Key]] | ||
| + | |- | ||
| + | | [[Limmu Later]] ([[Callopee]]) || [[Kristel Kaos]] || [[Image:BlueWhiteHexagonKey507.png|50px]] [[Blue-White Hexagon Key]] | ||
| + | |- | ||
| + | | [[Balcam Stacks]] ([[Groddle Forest]]) || [[Palindrone]] || [[Image:OrangeBlueSquareKey502.png|50px]] [[Orange-Blue Square Key]] | ||
| + | |- | ||
| + | | [[Shillrigg Tiers]] ([[Groddle Forest]]) || [[Snool]] || [[Image:TealRedHexagonKey503.png|50px]] [[Teal-Red Hexagon Key]] | ||
| + | |- | ||
| + | | [[Newcot Close]] ([[Groddle Heights]]) || [[Wintry Place]] || [[Image:RedGreenTriangleKey504.png|50px]] [[Red-Green Triangle Key]] | ||
| + | |- | ||
| + | | [[Thornfad Layers]] ([[Groddle Heights]]) || [[Vicar's Peak]] || [[Image:YellowPurpleTriangleKey499.png|50px]][[Yellow-Purple Triangle Key]] | ||
| + | |- | ||
| + | | [[Twickenrill Grotto]] ([[Groddle Meadow]]) || [[Palindrone]] || [[Image:OrangeBlueSquareKey502.png|50px]] [[Orange-Blue Square Key]] | ||
| + | |- | ||
| + | | [[Rookthills Lay]] ([[Groddle Meadow]]) || [[Martleby Hare]] || [[Image:GreenWhiteCircleKey501.png|50px]] [[Green-White Circle Key]] | ||
| + | |- | ||
| + | | [[Coldthorp Lam]] ([[Groddle Meadow]]) || [[Snool]] || [[Image:TealRedHexagonKey503.png|50px]] [[Teal-Red Hexagon Key]] | ||
| + | |- | ||
| + | | [[Subarna Spells]] ([[Ilmenskie Deeps]]) || [[Ajaya Bliss]] || [[Image:TealWhiteTriangleKey508.png|50px]] [[Teal-White Triangle Key]] | ||
| + | |- | ||
| + | | [[Kanji Sink]] ([[Kajuu]]) || [[Plexus]] || [[Image:BlueYellowCircleKey509.png|50px]] [[Blue-Yellow Circle Key]] | ||
| + | |- | ||
| + | | [[Ajiboo Hood]] ([[Pollokoo]]) || [[Kristel Kaos]] || [[Image:BlueWhiteHexagonKey507.png|50px]] [[Blue-White Hexagon Key]] | ||
| + | |- | ||
| + | | Drinks Room (Mazza'la Gala) || Dark Room || [[Image:PurpleRedSquareKey510.png|50px]] [[Purple-Red Square Key]] | ||
| + | |- | ||
| + | | [[Level 2 West]] ([[Ilmenskie Caverns]] || [[Oppidan Avenue]] || [[Image:YellowTealSquareKey506.png|50px]] [[Yellow-Teal Square Key]] | ||
| + | |- | ||
| + | | [[Khanda Jarra]] ([[Cauda]]) || [[Oppidan Avenue]] || [[Image:BlueYellowCircleKey509.png|50px]] [[Blue-Yellow Circle Key]] | ||
| + | |- | ||
| + | | [[Chettar Lings]] ([[Fenneq]]) || [[Autumn Lodge]] || [[Image:BlueWhiteHexagonKey507.png|50px]] [[Blue-White Hexagon Key]] | ||
| + | |- | ||
| + | | [[Sheba Shales]] ([[Tamila]]) || [[Autumn Lodge]] || [[Image:BlueWhiteHexagonKey507.png|50px]] [[Blue-White Hexagon Key]] | ||
| + | |- | ||
| + | | [[Gimbap Bop]] ([[Sura]]) || [[Umbra]] || [[Image:RedGreenTriangleKey504.png|50px]] [[Red-Green Triangle Key]] | ||
| + | |- | ||
| + | | [[Seeyam Far]] ([[Salatu]]) || [[Umbra]] || [[Image:GreenWhiteCircleKey501.png|50px]] [[Green-White Circle Key]] | ||
| + | |} | ||
| + | |||
| + | ==Keyed doors in [[Jethimadh Tower: Base]]== | ||
| + | * [http://www.glitch.com/locations/LIF1QBNPP7123J0/ Corridor One] ([[Orange-Blue Square Key]] found in Hidden Location off of [[Corridor One]]. Re-spawn time: 5 minutes. Also spawns behind small bottle tree on the far right on [[Simo Steer]]; respawn here is around 25 minutes.) | ||
| + | * [http://www.glitch.com/locations/LIF1Q3IQM7122SP/ Corridor Two] ([[Yellow-Purple Triangle Key]]). | ||
| + | * [http://www.glitch.com/locations/LIF1Q48RM712F87/ Corridor Three] ([[Green-White Circle Key]]). | ||
| + | * [http://www.glitch.com/locations/LTJ10K7P3812R8F/ Corridor Four] ([[Purple-Orange Circle Key]]). | ||
| + | * [http://www.glitch.com/locations/LTJ10K7P3812R8F/ Corridor Four] Door to challenge ''Room 15''. ([[Teal-Red Hexagon Key]] found within challenge ''Room 8''. Re-spawn time: once per room instance. | ||
| + | * [http://www.glitch.com/locations/LTJ110817812KO4/ Corridor Six] [[Purple-Orange Circle Key]] Door to challenge ''Room 16''. | ||
| + | * [http://www.glitch.com/locations/LTJ10M515812V0C/ Corridor Five] Door to challenge ''Room 23''. ([[Red-Green Triangle Key]]) | ||
| + | |||
| + | ==Key Spawn Locations== | ||
| + | {| class="wikitable sortable" border="1" width: 100%;" | ||
| + | |- | ||
| + | ! scope="col" | Key Image | ||
| + | ! scope="col" | Key Name | ||
| + | ! scope="col" | Spawn Location | ||
| + | ! scope="col" | Spawn Frequency | ||
| + | |- | ||
| + | | [[Image:YellowTealSquareKey506.png|50px]] || [[Yellow-Teal Square Key]] || [[Level 3 West]] ([[Ilmenskie Caverns]]); On a lower platform to the left of the right sign. || < 2 Minutes | ||
| + | |- | ||
| + | | [[Image:YellowPurpleTriangleKey499.png|50px]] || [[Yellow-Purple Triangle Key]] || [[Kiehiman Course]] ([[Jethimadh]]); behind small bottle tree in the middle || ≈ 15 Minutes | ||
| + | |- | ||
| + | | [[Image:YellowPurpleTriangleKey499.png|50px]] || [[Yellow-Purple Triangle Key]] || [[Thornfad Layers]] ([[Groddle Heights]]); bottom left, partially behind column || 10 Minutes | ||
| + | |- | ||
| + | | [[Image:YellowPurpleTriangleKey499.png|50px]] || [[Yellow-Purple Triangle Key]] || [[Jethimadh Tower: Base]] [[Corridor One: West]]; On ground, in front of door labeled "C1E" || Only once per game day; the key pops into the player's inventory without having to pick it up | ||
| + | |- | ||
| + | | [[Image:YellowPurpleTriangleKey499.png|50px]] || [[Yellow-Purple Triangle Key]] || [[Tadaa Track]] ([[Jethimadh]]); far right, behind bottle tree root || 10 Minutes | ||
| + | |- | ||
| + | | [[Image:RedGreenTriangleKey504.png|50px]] || [[Red-Green Triangle Key]] || [[Svarta Swale]] ([[Jethimadh]]); bottom of the ledges at the far left || ≈ 25 Minutes | ||
| + | |- | ||
| + | | [[Image:RedGreenTriangleKey504.png|50px]] || [[Red-Green Triangle Key]] || [[Jethimadh Tower: Base]] Challenge ''Room 16'' || Once per instance | ||
| + | |- | ||
| + | | [[Image:RedGreenTriangleKey504.png|50px]] || [[Red-Green Triangle Key]] || [[Newcot Close]] ([[Groddle Heights]]); Lower level, right-side behind column || 1 Minute | ||
| + | |- | ||
| + | | [[Image:TealWhiteTriangleKey508.png|50px]] || [[Teal-White Triangle Key]] || [[Gori Blear]] ([[Ilmenskie Deeps]]); upper left-hand corner, accessible with [[Spinach]] || 10–12 minutes | ||
| + | |- | ||
| + | | [[Image:TealWhiteTriangleKey508.png|50px]] || [[Teal-White Triangle Key]] || [[Nandak Intention]] ([[Ilmenskie Deeps]]); bottom right tunnel, accessible with [[Spinach]] || 10–12 minutes | ||
| + | |- | ||
| + | | [[Image:TealWhiteTriangleKey508.png|50px]] || [[Teal-White Triangle Key]] || [[Gomen Grap]] ([[Callopee]]); upper right corner || 10–12 minutes | ||
| + | |- | ||
| + | | [[Image:TealWhiteTriangleKey508.png|50px]] || [[Teal-White Triangle Key]] || [[Keywot Whot]] ([[Callopee]]); upper right corner || 10–12 minutes | ||
| + | |- | ||
| + | | [[Image:PurpleOrangeCircleKey505.png|50px]] || [[Purple-Orange Circle Key]] || [[Konemaen Jaunt]] ([[Jethimadh]]); behind bottle tree on the far right || ≈ 25 Minutes | ||
| + | |- | ||
| + | | [[Image:PurpleOrangeCircleKey505.png|50px]] || [[Purple-Orange Circle Key]] || [[Jethimadh Tower: Base]] Challenge ''Room 15'' || Once per instance | ||
| + | |- | ||
| + | | [[Image:GreenWhiteCircleKey501.png|50px]] || [[Green-White Circle Key]] || [[Raudan Rasp]] ([[Jethimadh]]); behind the bottle tree on the bottom, far right || 29 Minutes, 35 Seconds | ||
| + | |- | ||
| + | | [[Image:GreenWhiteCircleKey501.png|50px]] || [[Green-White Circle Key]] || [[Oulanka End]] ([[Jethimadh]]); upper right side, behind cave support || ≈ 25 Minutes | ||
| + | |- | ||
| + | | [[Image:GreenWhiteCircleKey501.png|50px]] || [[Green-White Circle Key]] || [[Jethimadh Tower: Base]] [[Corridor Three]]; behind column || 165 Seconds | ||
| + | |- | ||
| + | | [[Image:GreenWhiteCircleKey501.png|50px]] || [[Green-White Circle Key]] || [[Rookthills Lay]] ([[Groddle Meadow]]); Upper level, all the way to the right, in plain site on the ground || 10 Minutes | ||
| + | |- | ||
| + | | [[Image:GreenWhiteCircleKey501.png|50px]] || [[Green-White Circle Key]] || [[Seeyam Far]] ([[Salatu]]); bottom left of the street || < 2 Minutes | ||
| + | |- | ||
| + | | [[Image:BlueYellowCircleKey509.png|50px]] || [[Blue-Yellow Circle Key]] || [[Kanji Sink]] ([[Kajuu]]); bottom right corner, behind stalagmite || < 2 Minutes | ||
| + | |- | ||
| + | | [[Image:BlueYellowCircleKey509.png|50px]] || [[Blue-Yellow Circle Key]] || [[Pannaa Marrim]] ([[Cauda]]); middle-left, behind plant || < 2 Minutes | ||
| + | |- | ||
| + | | [[Image:TealRedHexagonKey503.png|50px]] || [[Teal-Red Hexagon Key]] || [[Shillrigg Tiers]] ([[Groddle Forest]]); Lower level, far left, slightly obscured by berm || ≈ 4 Minutes | ||
| + | |- | ||
| + | | [[Image:TealRedHexagonKey503.png|50px]] || [[Teal-Red Hexagon Key]] || [[Jethimadh Tower: Base]] Challenge ''Room 8'' || Once per instance | ||
| + | |- | ||
| + | | [[Image:TealRedHexagonKey503.png|50px]] || [[Teal-Red Hexagon Key]] || [[Simo Steer]] ([[Jethimadh]]); Far left, behind bottle tree || ≈ 40 Minutes | ||
| + | |- | ||
| + | | [[Image:TealRedHexagonKey503.png|50px]] || [[Teal-Red Hexagon Key]] || [[Coldthorp Lam]] ([[Groddle Meadow]]); Bottom Right, obscured by some rock || ≈ 5 Minutes | ||
| + | |- | ||
| + | | [[Image:BlueWhiteHexagonKey507.png|50px]]|| [[Blue-White Hexagon Key]] || [[Sinig Safes]]; lower right, obscured by stalagmites || 6 Minutes | ||
| + | |- | ||
| + | | [[Image:BlueWhiteHexagonKey507.png|50px]]|| [[Blue-White Hexagon Key]] || [[Luump Yasa]]; lower level || 6 Minutes | ||
| + | |- | ||
| + | | [[Image:BlueWhiteHexagonKey507.png|50px]]|| [[Blue-White Hexagon Key]] || [[Sinig Safes]]; behind a tree in the middle of Dingal Lin in Fenneq || 6 Minutes | ||
| + | |- | ||
| + | | [[Image:GreenOrangeHexagonKey511.png|50px]] || [[Green-Orange Hexagon Key]] || [[Bangala Bristles]] ([[Andra]]); Far left, obscured by some grass || Every 30 seconds, at :16 & :46 | ||
| + | |- | ||
| + | | [[Image:OrangeBlueSquareKey502.png|50px]] || [[Orange-Blue Square Key]] || [[Twickenrill Grotto]] ([[Groddle Forest]]); On the ground, directly above the keyed door to [[Palindrone]] || ≈ 5 Minutes | ||
| + | |- | ||
| + | | [[Image:OrangeBlueSquareKey502.png|50px]] || [[Orange-Blue Square Key]] || [[Balcam Stacks]] ([[Groddle Forest]]); Lower level, behind a berm just to the right of the [[Egg Plant]] on the right || ≈ 5 Minutes | ||
| + | |- | ||
| + | | [[Image:OrangeBlueSquareKey502.png|50px]] || [[Orange-Blue Square Key]] || [[Jethimadh Tower: Base]] [[Corridor One]]; In the secret room || ≈ 9 Minutes | ||
| + | |- | ||
| + | | [[Image:PurpleRedSquareKey510.png|50px]] || [[Purple-Red Square Key]] || Mazza'la Gala; Top right room, on the shelf above the door || n/a | ||
| + | |} | ||
==External links== | ==External links== | ||
| − | * Glitch Strategy group discussion of keys and doors [http:// | + | * Glitch Strategy group discussion of keys and doors [http://www.glitch.com/groups/RIFMOJS39CB1ULP/discuss/144/] |
Latest revision as of 13:47, 24 November 2017

A Key can be used to open a matching door often found in the same street, though some of the keys for the keyed doors in Jethimadh Tower can be found on the surrounding streets. Once used, a key will disappear from the player's inventory. Keys have no cash value and give no reward when donated to a shrine. Some keys spawn behind other objects, making them somewhat difficult to find.
Streets with keyed doors
Keyed doors in Jethimadh Tower: Base
- Corridor One (Orange-Blue Square Key found in Hidden Location off of Corridor One. Re-spawn time: 5 minutes. Also spawns behind small bottle tree on the far right on Simo Steer; respawn here is around 25 minutes.)
- Corridor Two (Yellow-Purple Triangle Key).
- Corridor Three (Green-White Circle Key).
- Corridor Four (Purple-Orange Circle Key).
- Corridor Four Door to challenge Room 15. (Teal-Red Hexagon Key found within challenge Room 8. Re-spawn time: once per room instance.
- Corridor Six Purple-Orange Circle Key Door to challenge Room 16.
- Corridor Five Door to challenge Room 23. (Red-Green Triangle Key)
Key Spawn Locations
| Key Image | Key Name | Spawn Location | Spawn Frequency |
|---|---|---|---|
| Yellow-Teal Square Key | Level 3 West (Ilmenskie Caverns); On a lower platform to the left of the right sign. | < 2 Minutes | |
| Yellow-Purple Triangle Key | Kiehiman Course (Jethimadh); behind small bottle tree in the middle | ≈ 15 Minutes | |
| Yellow-Purple Triangle Key | Thornfad Layers (Groddle Heights); bottom left, partially behind column | 10 Minutes | |
| Yellow-Purple Triangle Key | Jethimadh Tower: Base Corridor One: West; On ground, in front of door labeled "C1E" | Only once per game day; the key pops into the player's inventory without having to pick it up | |
| Yellow-Purple Triangle Key | Tadaa Track (Jethimadh); far right, behind bottle tree root | 10 Minutes | |
| Red-Green Triangle Key | Svarta Swale (Jethimadh); bottom of the ledges at the far left | ≈ 25 Minutes | |
| Red-Green Triangle Key | Jethimadh Tower: Base Challenge Room 16 | Once per instance | |
| Red-Green Triangle Key | Newcot Close (Groddle Heights); Lower level, right-side behind column | 1 Minute | |
| Teal-White Triangle Key | Gori Blear (Ilmenskie Deeps); upper left-hand corner, accessible with Spinach | 10–12 minutes | |
| Teal-White Triangle Key | Nandak Intention (Ilmenskie Deeps); bottom right tunnel, accessible with Spinach | 10–12 minutes | |
| Teal-White Triangle Key | Gomen Grap (Callopee); upper right corner | 10–12 minutes | |
| Teal-White Triangle Key | Keywot Whot (Callopee); upper right corner | 10–12 minutes | |
| Purple-Orange Circle Key | Konemaen Jaunt (Jethimadh); behind bottle tree on the far right | ≈ 25 Minutes | |
| Purple-Orange Circle Key | Jethimadh Tower: Base Challenge Room 15 | Once per instance | |
| Green-White Circle Key | Raudan Rasp (Jethimadh); behind the bottle tree on the bottom, far right | 29 Minutes, 35 Seconds | |
| Green-White Circle Key | Oulanka End (Jethimadh); upper right side, behind cave support | ≈ 25 Minutes | |
| Green-White Circle Key | Jethimadh Tower: Base Corridor Three; behind column | 165 Seconds | |
| Green-White Circle Key | Rookthills Lay (Groddle Meadow); Upper level, all the way to the right, in plain site on the ground | 10 Minutes | |
| Green-White Circle Key | Seeyam Far (Salatu); bottom left of the street | < 2 Minutes | |
| Blue-Yellow Circle Key | Kanji Sink (Kajuu); bottom right corner, behind stalagmite | < 2 Minutes | |
| Blue-Yellow Circle Key | Pannaa Marrim (Cauda); middle-left, behind plant | < 2 Minutes | |
| Teal-Red Hexagon Key | Shillrigg Tiers (Groddle Forest); Lower level, far left, slightly obscured by berm | ≈ 4 Minutes | |
| Teal-Red Hexagon Key | Jethimadh Tower: Base Challenge Room 8 | Once per instance | |
| Teal-Red Hexagon Key | Simo Steer (Jethimadh); Far left, behind bottle tree | ≈ 40 Minutes | |
| Teal-Red Hexagon Key | Coldthorp Lam (Groddle Meadow); Bottom Right, obscured by some rock | ≈ 5 Minutes | |
| Blue-White Hexagon Key | Sinig Safes; lower right, obscured by stalagmites | 6 Minutes | |
| Blue-White Hexagon Key | Luump Yasa; lower level | 6 Minutes | |
| Blue-White Hexagon Key | Sinig Safes; behind a tree in the middle of Dingal Lin in Fenneq | 6 Minutes | |
| Green-Orange Hexagon Key | Bangala Bristles (Andra); Far left, obscured by some grass | Every 30 seconds, at :16 & :46 | |
| Orange-Blue Square Key | Twickenrill Grotto (Groddle Forest); On the ground, directly above the keyed door to Palindrone | ≈ 5 Minutes | |
| Orange-Blue Square Key | Balcam Stacks (Groddle Forest); Lower level, behind a berm just to the right of the Egg Plant on the right | ≈ 5 Minutes | |
| Orange-Blue Square Key | Jethimadh Tower: Base Corridor One; In the secret room | ≈ 9 Minutes | |
| Purple-Red Square Key | Mazza'la Gala; Top right room, on the shelf above the door | n/a |
External links
- Glitch Strategy group discussion of keys and doors [1]