Key
Jump to navigation
Jump to search
The printable version is no longer supported and may have rendering errors. Please update your browser bookmarks and please use the default browser print function instead.

A Key can be used to open a matching door often found in the same street, though some of the keys for the keyed doors in Jethimadh Tower can be found on the surrounding streets. Once used, a key will disappear from the player's inventory. Keys have no cash value and give no reward when donated to a shrine. Some keys spawn behind other objects, making them somewhat difficult to find.
Streets with keyed doors
Keyed doors in Jethimadh Tower: Base
- Corridor One (Orange-Blue Square Key found in Hidden Location off of Corridor One. Re-spawn time: 5 minutes. Also spawns behind small bottle tree on the far right on Simo Steer; respawn here is around 25 minutes.)
- Corridor Two (Yellow-Purple Triangle Key).
- Corridor Three (Green-White Circle Key).
- Corridor Four (Purple-Orange Circle Key).
- Corridor Four Door to challenge Room 15. (Teal-Red Hexagon Key found within challenge Room 8. Re-spawn time: once per room instance.
- Corridor Six Purple-Orange Circle Key Door to challenge Room 16.
- Corridor Five Door to challenge Room 23. (Red-Green Triangle Key)
Key Spawn Locations
| Key Image | Key Name | Spawn Location | Spawn Frequency |
|---|---|---|---|
| Yellow-Teal Square Key | Level 3 West (Ilmenskie Caverns); On a lower platform to the left of the right sign. | < 2 Minutes | |
| Yellow-Purple Triangle Key | Kiehiman Course (Jethimadh); behind small bottle tree in the middle | ≈ 15 Minutes | |
| Yellow-Purple Triangle Key | Thornfad Layers (Groddle Heights); bottom left, partially behind column | 10 Minutes | |
| Yellow-Purple Triangle Key | Jethimadh Tower: Base Corridor One: West; On ground, in front of door labeled "C1E" | Only once per game day; the key pops into the player's inventory without having to pick it up | |
| Yellow-Purple Triangle Key | Tadaa Track (Jethimadh); far right, behind bottle tree root | 10 Minutes | |
| Red-Green Triangle Key | Svarta Swale (Jethimadh); bottom of the ledges at the far left | ≈ 25 Minutes | |
| Red-Green Triangle Key | Jethimadh Tower: Base Challenge Room 16 | Once per instance | |
| Red-Green Triangle Key | Newcot Close (Groddle Heights); Lower level, right-side behind column | 1 Minute | |
| Teal-White Triangle Key | Gori Blear (Ilmenskie Deeps); upper left-hand corner, accessible with Spinach | 10–12 minutes | |
| Teal-White Triangle Key | Nandak Intention (Ilmenskie Deeps); bottom right tunnel, accessible with Spinach | 10–12 minutes | |
| Teal-White Triangle Key | Gomen Grap (Callopee); upper right corner | 10–12 minutes | |
| Teal-White Triangle Key | Keywot Whot (Callopee); upper right corner | 10–12 minutes | |
| Purple-Orange Circle Key | Konemaen Jaunt (Jethimadh); behind bottle tree on the far right | ≈ 25 Minutes | |
| Purple-Orange Circle Key | Jethimadh Tower: Base Challenge Room 15 | Once per instance | |
| Green-White Circle Key | Raudan Rasp (Jethimadh); behind the bottle tree on the bottom, far right | 29 Minutes, 35 Seconds | |
| Green-White Circle Key | Oulanka End (Jethimadh); upper right side, behind cave support | ≈ 25 Minutes | |
| Green-White Circle Key | Jethimadh Tower: Base Corridor Three; behind column | 165 Seconds | |
| Green-White Circle Key | Rookthills Lay (Groddle Meadow); Upper level, all the way to the right, in plain site on the ground | 10 Minutes | |
| Green-White Circle Key | Seeyam Far (Salatu); bottom left of the street | < 2 Minutes | |
| Blue-Yellow Circle Key | Kanji Sink (Kajuu); bottom right corner, behind stalagmite | < 2 Minutes | |
| Blue-Yellow Circle Key | Pannaa Marrim (Cauda); middle-left, behind plant | < 2 Minutes | |
| Teal-Red Hexagon Key | Shillrigg Tiers (Groddle Forest); Lower level, far left, slightly obscured by berm | ≈ 4 Minutes | |
| Teal-Red Hexagon Key | Jethimadh Tower: Base Challenge Room 8 | Once per instance | |
| Teal-Red Hexagon Key | Simo Steer (Jethimadh); Far left, behind bottle tree | ≈ 40 Minutes | |
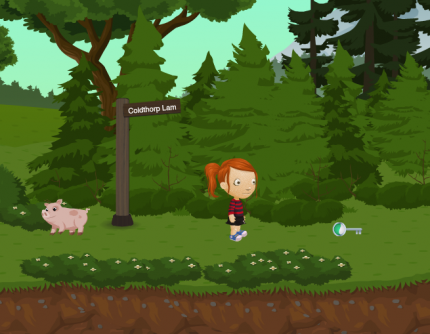
| Teal-Red Hexagon Key | Coldthorp Lam (Groddle Meadow); Bottom Right, obscured by some rock | ≈ 5 Minutes | |
| Blue-White Hexagon Key | Sinig Safes; lower right, obscured by stalagmites | 6 Minutes | |
| Blue-White Hexagon Key | Luump Yasa; lower level | 6 Minutes | |
| Blue-White Hexagon Key | Sinig Safes; behind a tree in the middle of Dingal Lin in Fenneq | 6 Minutes | |
| Green-Orange Hexagon Key | Bangala Bristles (Andra); Far left, obscured by some grass | Every 30 seconds, at :16 & :46 | |
| Orange-Blue Square Key | Twickenrill Grotto (Groddle Forest); On the ground, directly above the keyed door to Palindrone | ≈ 5 Minutes | |
| Orange-Blue Square Key | Balcam Stacks (Groddle Forest); Lower level, behind a berm just to the right of the Egg Plant on the right | ≈ 5 Minutes | |
| Orange-Blue Square Key | Jethimadh Tower: Base Corridor One; In the secret room | ≈ 9 Minutes | |
| Purple-Red Square Key | Mazza'la Gala; Top right room, on the shelf above the door | n/a |
External links
- Glitch Strategy group discussion of keys and doors [1]